Managing Cloud Print for Mobility Print
This section covers how to:
Manage existing links
After enabling Cloud Print and creating your first invite link, you can manage Cloud Print and your invite links.

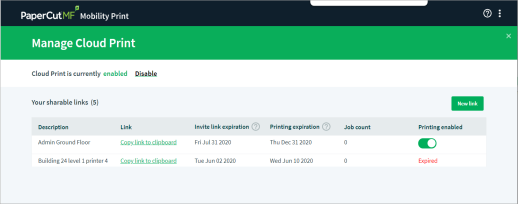
From the Manage Cloud Print page you can disable the entire Cloud Print feature, view your existing links, create new links, and disable individual links.
If you disable Cloud Print or Cloud Print invite link, you can re-enable it again without requiring users to set up their printing again.
All of your existing links can be seen in the table on this screen. You can see expiry dates and the number of print jobs from clients using this link. You can also copy these links to be shared with you users again.
Create a new link
Follow the three steps:
Step 1: Configure Cloud Print in the Mobility Print server
Set up Cloud Print on Chromebooks
Disable a link
Click the toggle for the link you want to disable. This prevents:
-
new users from setting up with this link
-
exising users who were already set up being able to print over the internet.
Disable the Cloud Print feature
To switch off Cloud Print for all users, click Disable at the top of the page. This prevents:
-
new users from setting up Cloud Print
-
existing users who were already set up being able to print over the internet.
You can re-enable it again, which will automatically enable printing again for users without requiring them to setup printing again.