Step 1: Configure Cloud Print in the Mobility Print server
This section covers how to:
Either follow the video below or scroll down for the steps.
Enable Cloud Print
-
Open the Mobility Print Admin interface: http://localhost:9163/admin
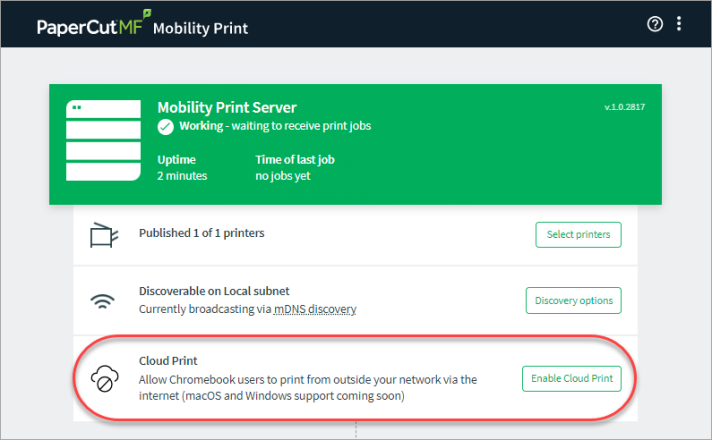
You’ll see the new Cloud Print section in the central panel.

-
Click Enable Cloud Print.
NOTEThe first time you do this, you'll see a one-off information pop-up. Read it and click Enable.
Create a Cloud Print invite link
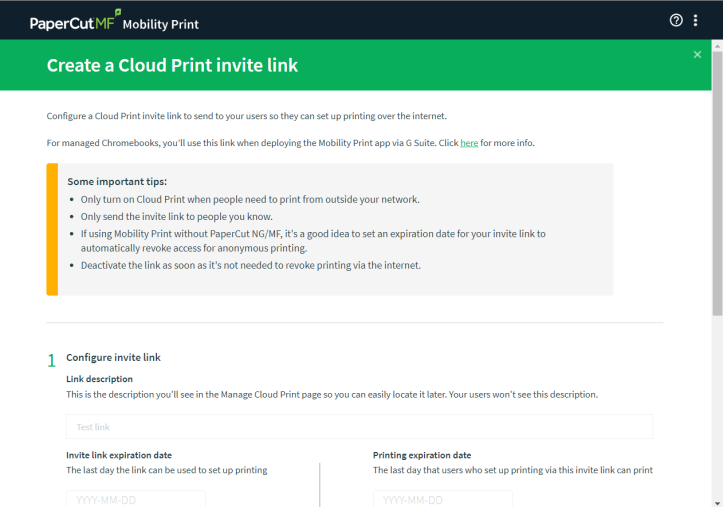
You can configure multiple invite links, each with its own invite expiration date and printing expiration date. After they’re set up, you’ll be able to see how many print jobs are printed via each one, and manually deactivate any link at any time.
| Invite link expiration date | Defines the period of time that users can use the link to set up their device with access to your server and its printers. This means users can’t keep re-using the same invite to set up printing forever and allows you to stop new users from setting up, without revoking printing for those that already have set up. |
| Printing expiration date | Lets you disable printing for all users who set up printing via that particular invite link. It also prevents new users being able to set up printing with that particular invite link. This doesn’t impact printing for users who set up printing using a different invite link. |
For example, Conference A is running from 1 to 5 June and Conference B is running from 8 to 12 June. Set up a separate invite link and print expiration date for each conference.
If you're a PaperCut NG or MF user, you can still control printing per user. This means you can be a bit less strict on your expiration date choices, or even decide to never expire the link.
However if you are not integrating Mobility Print with PaperCut NG/MF, we recommend you set a suitable expiry time, so that after this date new users cannot set up access to printing to this server over the internet.
You can always manually disable an invite link in the future. The printing expiration date helps you keep control in case you forget to disable any links.
-
In the Cloud Print section, click Enable Cloud Print. The Create a Cloud Print invite link page is displayed.

-
Follow the step 1 instructions on the page; then click Generate link. The link is displayed underneath the button.

-
Click Copy to clipboard and save the link somewhere handy. You’ll need to use it next to configure your devices.
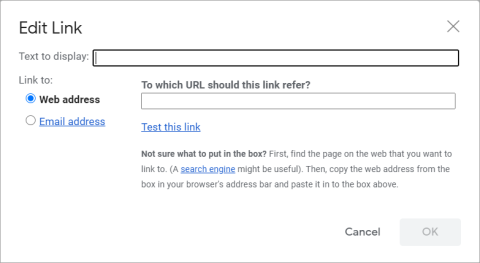
TIPThe link is long! If you're sending it via email to your end users, you might want to use the insert link tool to create a shorter link. This screenshot shows an example using Gmail.
